
First off I must start this blog post with a couple of thank you's. To Prima for this wonderful gift of Bed Time Story products. I won their giveaway after CHA for a selection of goodies (you can see the whole blog post HERE if you missed it). I had intended to have this little book done zippidy doo daa fast but you know how real life kicks in and alters your crafty time don't you! The little one has yet to arrive so I'm still ahead of the game.
Secondly I want to thank Anna Komenda for her video tutorial How to Create a Folding Mini Album. Anna is from Europe and her video is not in English but it's still easy enough to figure out. A viewer, Doris Cote offered the conversion to inches for us and I'll post that below the video for any of you wanting to make a mini like this for yourself.
So without further ado let me share my little mini and little it is, it measures 4 1/4" x 3 1/4" with 8 folding pages.

I used several Martha Stewart border die punches for the front, a fussy cut element from the outside cover of the 6x6" paper pad (I liked this because the cover is glossy and thicker and will stand up well on the outside), a covered button element I found in my stash (perfect color match) and tied with a satin ribbon from The Piece by Piece.
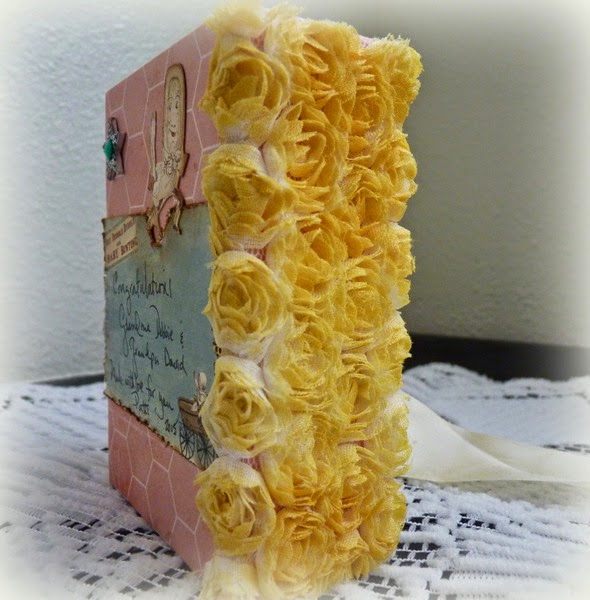
The spine is covered with a mini rose trim from Sa Crafters (she no longer carries this, sorry). The trim was white but I used the Color Bloom Mist in Yellow Mustard Prima had sent in my package. I lightly misted it so parts of the white still show, I liked this look instead of heavily saturated. This is my first experience with the Color Bloom sprays and I really liked how the mist bottle worked, often times mists are wonky and I like when you have control and it goes where you want it to!

Here's where I used 3 of my Martha Stewart edge punches, Vintage Floral - Doily Lace - Beaded Arches. I used tape on the backs and glued one to the other over the top. It wasn't until I had finished gluing that I thought oops that wasn't too smart, the glue strip popped out between all the delicate cuts from the punches so of course the top was now sticky. Isn't it wonderful how often times mistakes make the best finishes? I sprinkled on some of the fine Dazzling Diamond dust from Stampin' Up and my problem was solved and a nice sparkly effect now enhances the front of the mini.

To secure the book I ran a piece of Satin Ribbon from The Piece by Piece around my book first, all other elements were placed over the top of the ribbon To secure just run a strip of wide sticky tape such as Angel Craft, Scor-Tape, Redline or Miracle tape around the book first, place your ribbon over top to hold in place while you position the rest of your outside book elements.

Here's one side of the book unfolded, There are 4 folds on each side, eight pages, sixteen total counting both sides. Even though the photos will be smaller there is load of room to put them in this book. Since the book closes with the tie you have a lot of room for expansion.

I doubt the Grandparents I made this little brag book for have ever seen anything like this. So to help them place the photos and cut them out I took the dies I used for the oval and square mats and traced on the inside of the die, cut it out and then wrote with felt pen on the front so they realize these are the photo templates. When you trace and cut on the inside edge of your die then you are creating a 1/4" border around your photos when they are glued to the mats.

I like that there is a 1/4" gusset on each fold to allow room for not only the glued down photos and mats but lots of small photos or keepsakes to be tucked into the pockets.
OK that's all the peeks I'm showing, you'll need to join me on the video to see each of the pages and all the products I used. Thanks so much for stopping by, I'd be honored if you subbed to my blog and YouTube channels! Oh yes, I also have a Facebook Page, geez I'm just all over the place aren't I, lol.
Conversion of meters to inches courtesy of Doris Cote
American measurements: Cardboard = all from a 12x 6 1/2 inch strip. You
will have a smidge left over. Cut the strip at 2 inches, 2 1/2 inches, 3 1/8
inches, 1 3/8 inches, 1 1/8 inch. Cover patterned paper (pp) cut 12x 61/2 inch.
I also cut several 1/8 inch strips of cardboard to help me line up the actual
cardboard pieces as spacers. Place the cardboard pieces in the following order:
2 1/2, 1 3/8, 3 1/8, 1 1/8, 2 inches.The pages are cut from double sided pp at
6 1/4 x 4 inches.
Thank you Doris for sharing your conversions!
2 comments:
Absolutly beautiful! Love the vintage feel. Thanks so much for sharing! ~ Terry Y.
Adorable mini album. I have this on my "must try" list.
Post a Comment